There are multiple ways to create Cues in Mitti. Video and Still Image Cues can be created by simply drag-n-dropping files from Finder to Mitti's Playlist view, while Syphon, Camera and NDI Cues types are only accessible from the File... Menu. Once you created a Cue it will be added to the Playlist.
All Cues have the same general UI, with two states: collapsed and expanded - the default can be set in Preferences... - Playlist.
The expanded state will show you the Cue In and Out Time or the TRT, depending of what you set in the View... menu, as well as the following Cue Options:
You can also set the default state of common Cue Toggles - so the toggle-states defined here will be applied whenever you create a new Cue.
Once you have multiple Cues, there will be always a current one. The Current Cue's Title and Cue Number will be drawn by blue, and the Playhead Slider will be attached to the Current Cue.
Usually you select a Cue and hit ENTER to play it, but of course you can use Transport Controls, and JUMP commands like double-click will work too, as described in the Getting Started section.
The reorder one or more Cue, select them, hold down the mouse button and drag them to the new location.
To select Cues, you can use the UP ARROW and DOWN ARROW keys, as well as your left mouse button. CMD and SHIFT can be used as modifiers just like in Finder.
To remove one or more Cues, select them and hit CMD+DELETE.
Right-clicking on one or more Cues will popup a contextual menu where you can access various options, start transcoding, etc.
You can search for a Cue ID - more info the General section below - by typing numbers & letters to the Playlist. Mitti will scroll to and select the cue with matching Cue ID.
You can access the Cue Preferences from the Cue Inspector on the right-side. The tabs can be collapsed and expanded just like Cues.
While some options are related to specific Cue types, most of them are common and available for almost all types of Cues. Here is a list of the most common options.
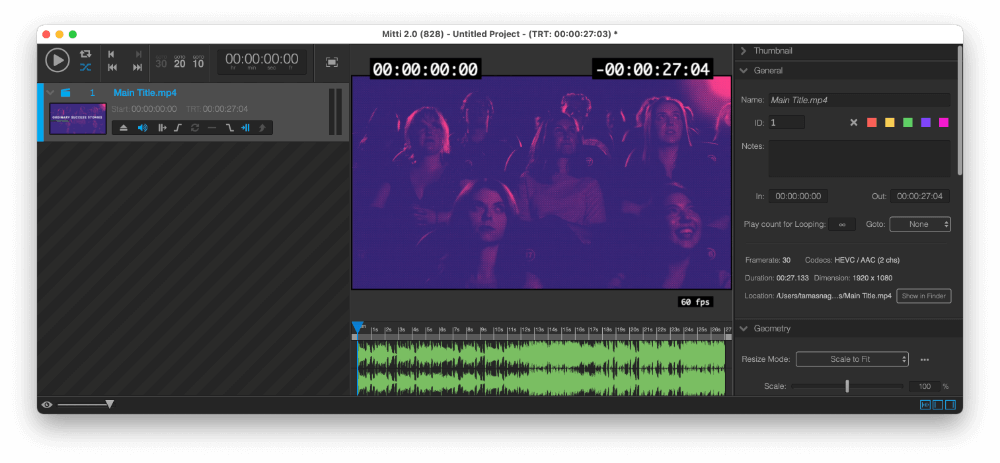
Here you will find information about the selected cue - codecs, duration, framerate, dimension and location.
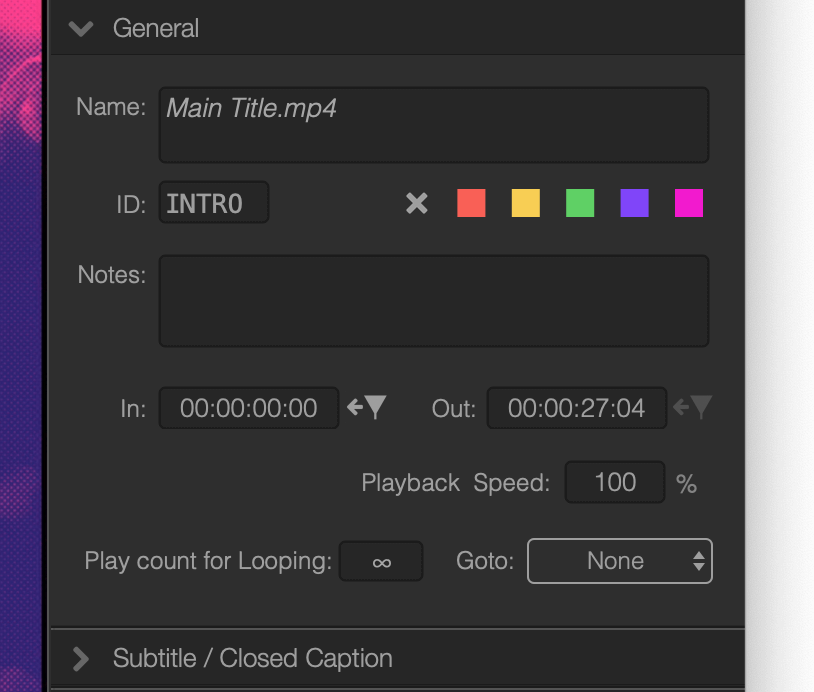
In the General section you will find the following options:
Goto: you can specify a target Cue here, where Mitti should jump when it is played out.
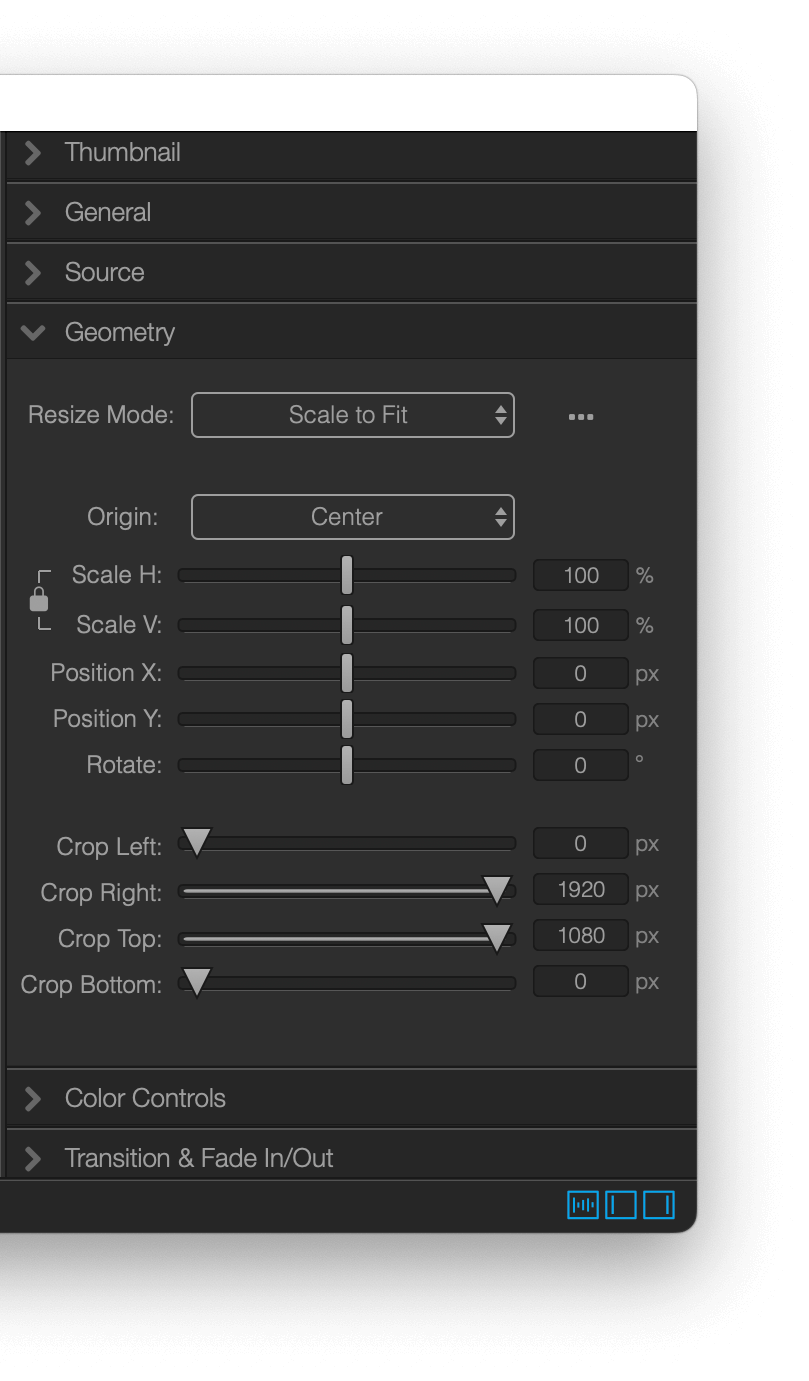
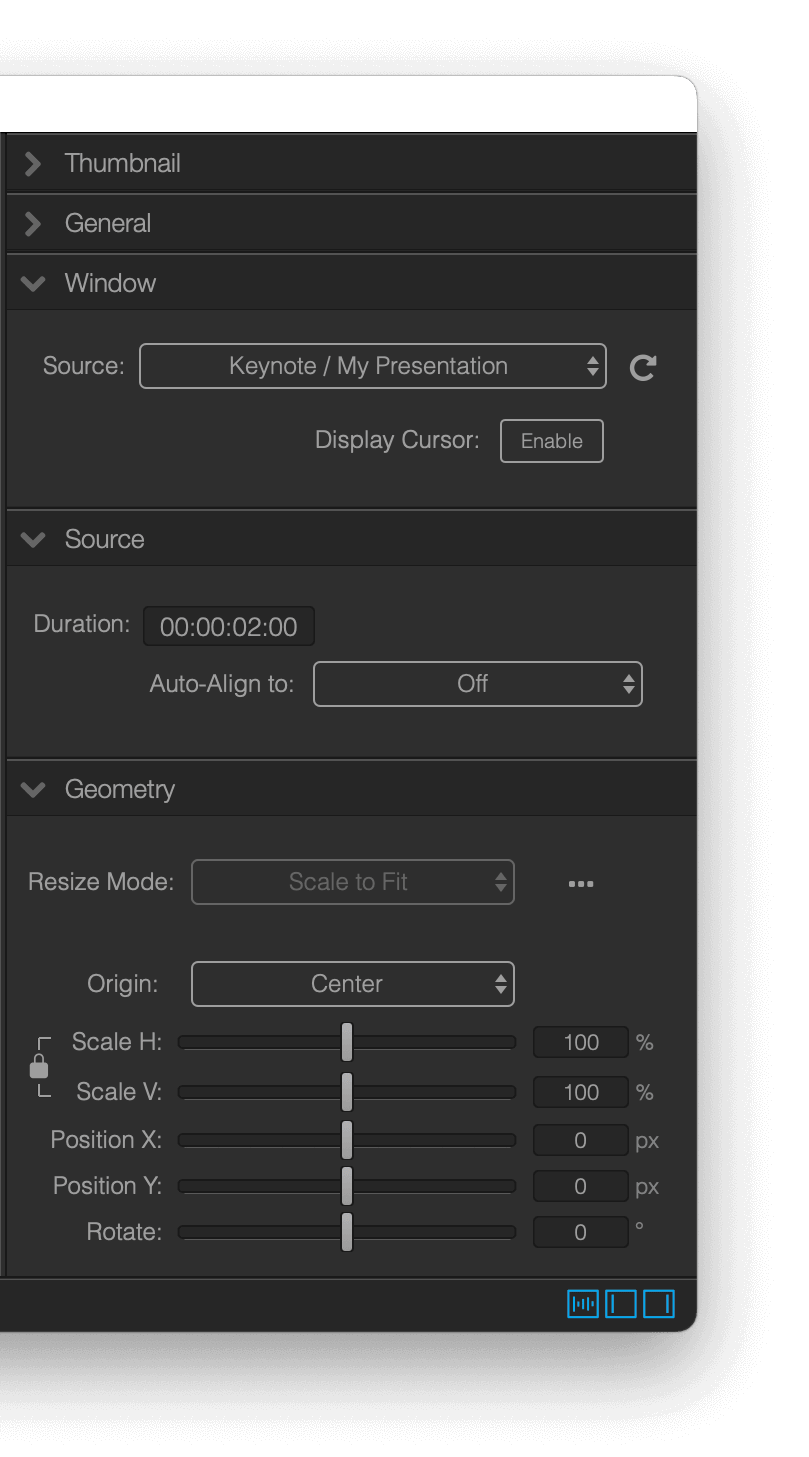
This is where you can set what Mitti should do when the dimensions of the selected media does not match to the output rendering dimension (Canvas) - Fit/Fill/Stretch/Unscaled are your options.
You can also Rotate, Scale, Position or Crop your Cue here.
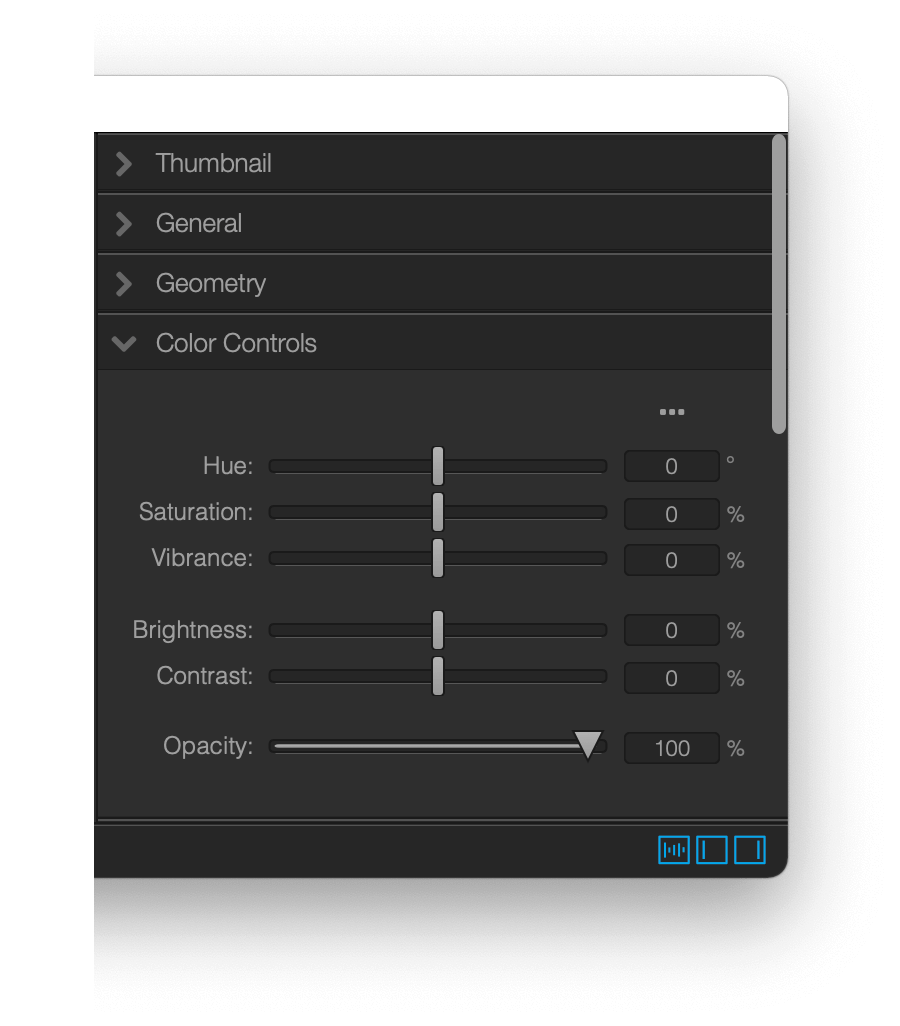
With Color Controls you can set the opacity, brightness, contrast, HSV for each Cue.
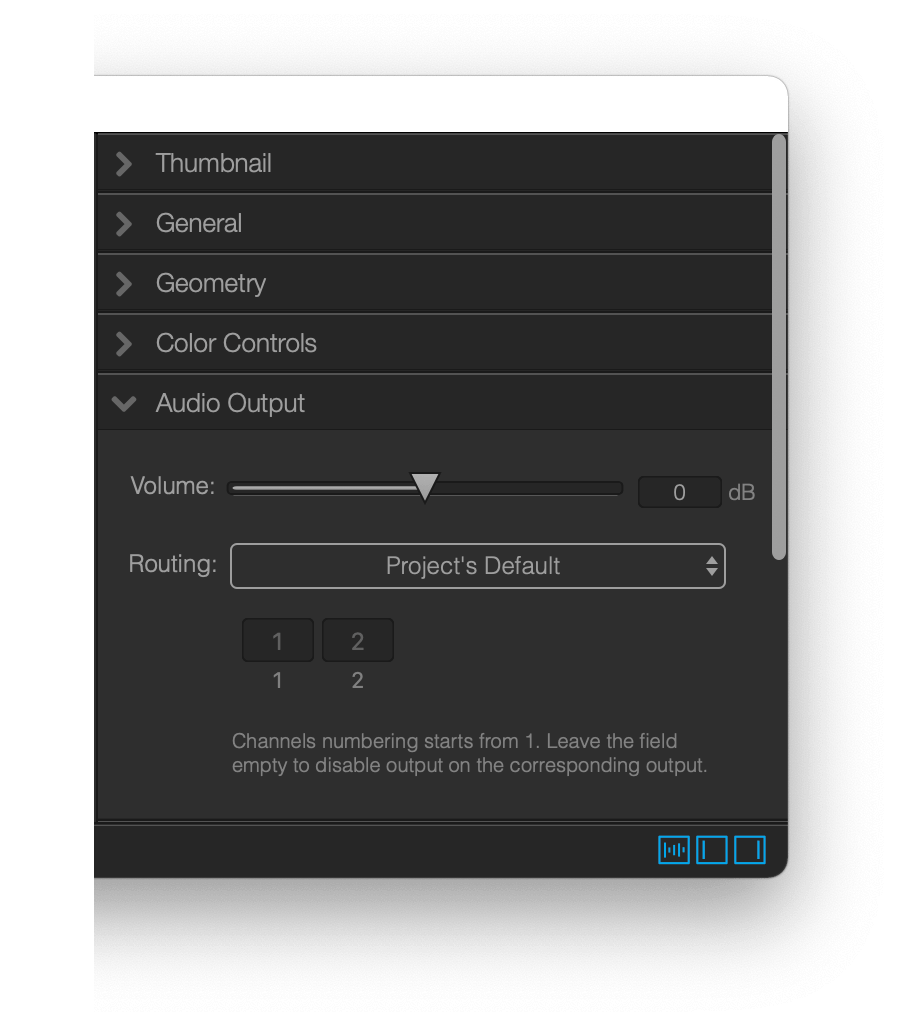
You can set the Volume here for each Cue.
Cues using the Output Routing what you set in Audio Output Preferences by default, but you can override this on a per-Cue basis here.
This option is only available if your Cue contains and audio track of course.
You can set the transition type Mitti should use when you are switching to this Cue, as well as the transition and fade duration.
![]()
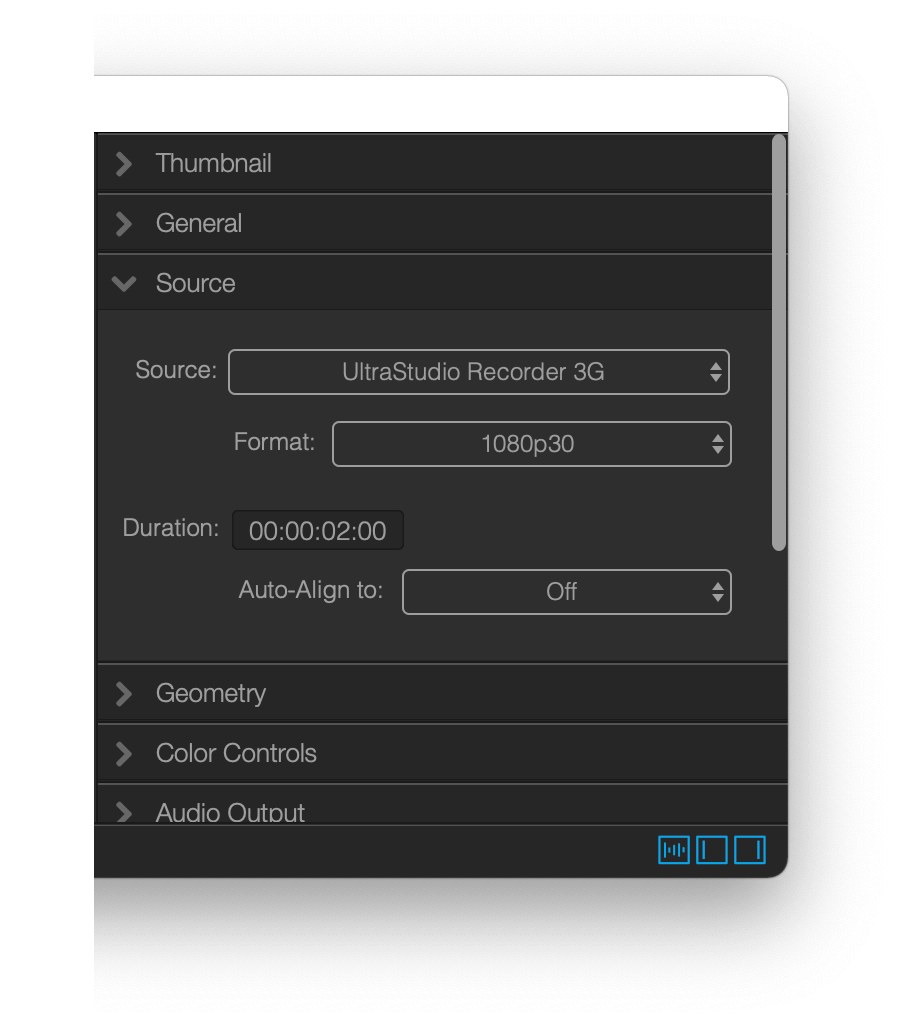
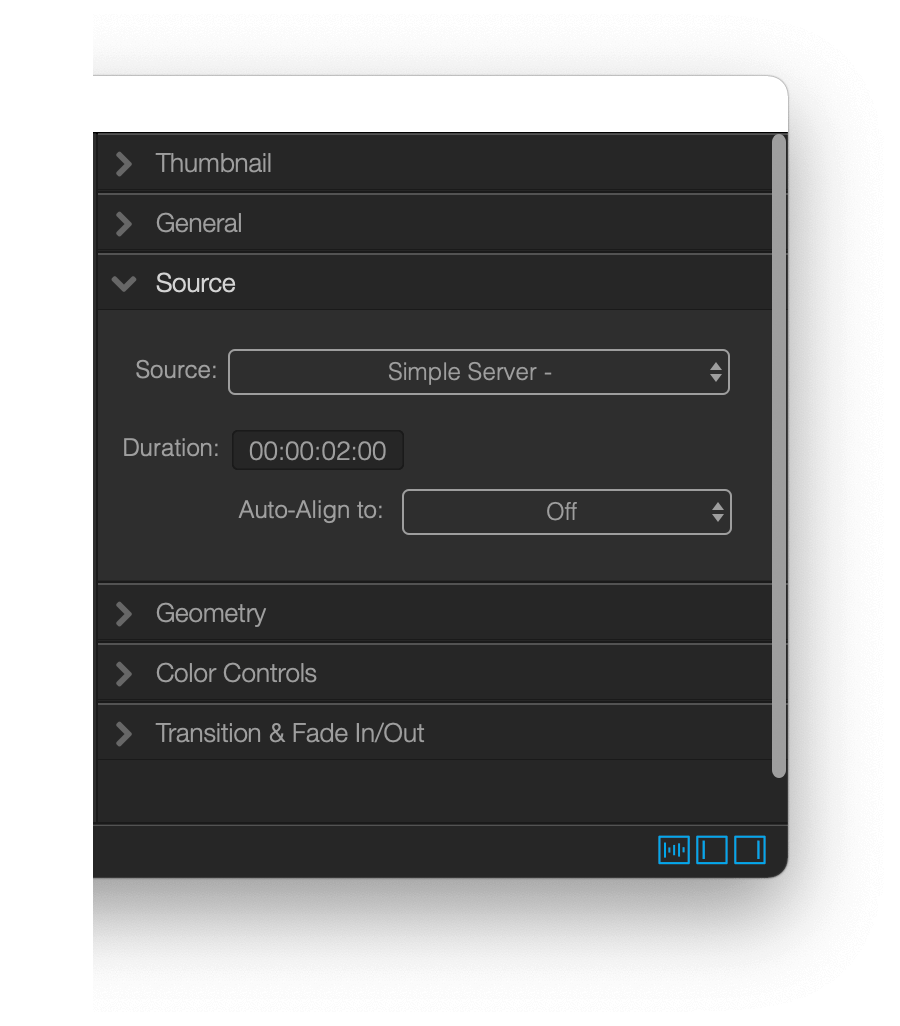
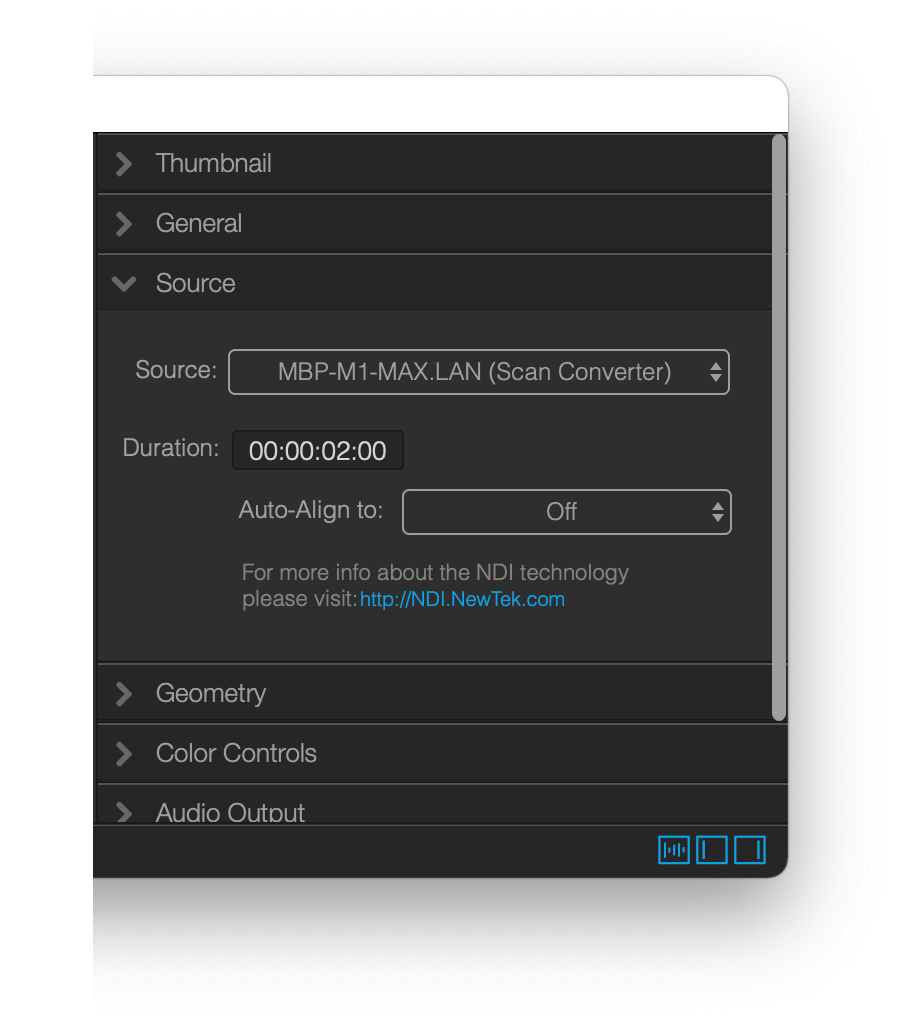
Still images, Syphon and NDI sources, so non-movie Cues have an option to automatically set their duration to be aligned to the Next Minute or Next Hour in their Source settings.
This feature is especially useful when you are using Mitti in LTC/MTC Timecode follower mode with Still Images - as a workaround - for setting the Start Time of Video Cues.
For file based media, Mitti - since version 2.8 - automatically track and update location and file name changes on the local computer.
Mitti can play files in any format supported by AVFoundation (the library used by Mitti for video decoding), listed in order of preference, for videos without transparency:
For videos with transparency:
Mitti prefers pre-multiplied alpha for transparent videos.
With systems where Apple AfterBurner card is present, or with the Apple M1 Pro and Max chip based computer Mitti will leverage its power with hardware accelerated ProRes decoding, so this case ProRes is the best choice ultimately.
In other cases, videos at 4K resolution and over, HAP could perform better than ProRes if you are outputting to external screens thru HDMI/DisplayPort/VGA/DVI. For more info about the GPU accelerated HAP codec family, please check out https://hap.video
But if you are only output to SDI (via BlackMagic Output) output, ProRes is generally the best choice of codec for you, because that case Mitti needs to send pixel data with the CPU instead of the GPU.
The list of supported codecs can be appended by a number of other common formats if you have Apple's Pro Video Formats Bundle installed.
Still Images are also supported in the most common formats, but we recommend PNG and JPG. Mitti can also render PDF files.
To leverage the wider color range of 10 bit rendering, your source media files should use 10 bit color depth too. These codecs are supported for video:
For still images you can use:
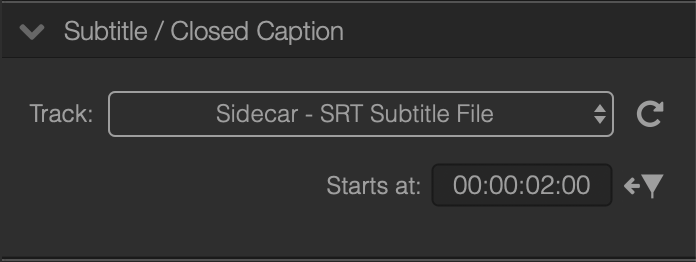
Mitti 2.5 is now able to render sidecar .SRT and .SCC files, as well as Quicktime embedded CEA-608 caption tracks on outputs, as open caption. Whenever you add a video to the playlist, Mitti checks for embedded caption tracks and supported sidecar files.
For Mitti to be able to recognize a sidecar file, it's name should start as the same as the video. For example, both of these file names will be good if your video is "myvideo.mov":
You can also see and change the start time of the selected subtitle on this panel.
You can change the Font Size and Family in Preferences, as well as the default Font and Background colors.
Please note: both SRT subtitles and CEA-608 captions are allowed to set specific colors on a per-character basis!
You can toggle rendering of Subtitles / Closed Captions on each output in Mitti's Video Output Settings, and even on Preview from the View... menu.
Please note sending CC data thru SDI as VANC data when using Blackmagic Output is currently not supported!
Got new and untested files last minute? No problem, you can transcode them to the recommended ProRes or HAP video codec from the Cue right-click menu. Audio tracks will remain untouched.
Transcoded files are added to the ~/Movies/Mitti/Transcoded folder with the ProRes or HAP suffix.
Mitti's Camera cue recognizes input from:
Once you created a Camera Cue, you can set it's source and change it's duration in the Cue Inspector. Selecting a Blackmagic DeckLink device will add a new popup where you can select the format of the incoming video data.
With Blackmagic devices, the audio is also supported.
Mitti supports incoming Syphon transmission from any Syphon enabled apps by Syphon Cues.
Once you created a Syphon Cue, you can set its source and change its duration.
NDI™ by NewTek Inc., is a new technology for IP-based video production. With NDI Cues in Mitti, you can use any NDI output-enabled video application on the local network as sources.
Once you created a NDI Cue, you can set its source and change its.
Audio Cues works and can be created just like Video and Still Images Cues. The following formats are supported:
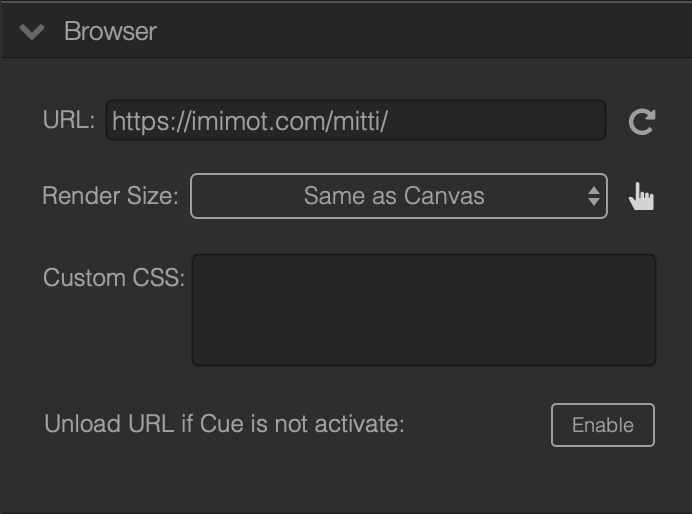
Mitti can render web pages using a transparent, offscreen WebKit based browser. This option is mainly created to make it easy to render popular web-based lower third applications like H2R Graphics, Holographics or SPX Graphics in Mitti, then play out to your switcher using HDMI, SDI or NDI.
If you are running macOS Monterey 12.3 at least, this feature leverages the power of the new ScreenCaptureKit API that makes rendering super-smooth, but Mitti will ask for Screen Recording permission. In earlier macOS versions this privilege is not needed because Mitti will use an older and graphics technology - it is little less performant, but works fine too.
If you need to interact with the offscreen webpage, you can click on the little hand icon on the Inspector, then Mitti will display the browser in a Window for you - you can click on cookie banners, buttons, scroll or login if need. When you're ready, just close the window to quit from interaction mode.
The new Window Source feature in Mitti v2.5 allows you to use a window of a running application as a Cue in your playlist - for example, Keynote.
Important: This features is only exists on macOS 10.12.3 Monterey and later.
Still stuck? How can we help?